Most Quality Assurance Managers and Regulatory Auditors focus on long-term calibration drift of particle counters as measured between calibration intervals. However, few are aware of short-term calibration drift problems that can cause a particle counter to vary by as much as 17%-30% over relatively short periods of time. This variability may potentially result in multiple out-of-tolerance conditions.
Calibration of particle counters is required due to errors caused by a variety of factors, such as drift, environment, electrical supply, process changes, etc. Because the calibration of a particle counter is performed by comparing or applying a known signal to the instrument under test (i.e., a comparative measurement), errors are therefore detected by performing a periodic calibration.
Unfortunately, current international standards and industry practices fail to account for the Stability of a Measurement Instrument, which is defined as “A property of a measuring instrument, whereby its metrological properties remain constant over time.”
Measurement Accuracy is the closeness of a measurement to the actual quantity that was measured. Measurement Precision, on the other hand, is defined as how close one measurement result will be to another result or set of results under specified conditions.
Precision should not be mistaken for accuracy, as a precise instrument could give a consistently erroneous result if not accurate. The term precision is often used as a synonym for an instrument’s repeatability. When speaking of this subject, it is helpful to think of a shooting target, the bullseye being the ISO 21501-4 standard for a particle counter calibration (see Fig. 1).
When calibrating a particle counter, certain measurements are taken in accordance with the standard ISO 21501-4. This standard measures the accuracy of a particle counter.
Unfortunately, no ISO standard or industry practice addresses measurement stability of a particle counter over time, which is a subset of repeatability.
It is a basic law of physics that virtually every measurement instrument will experience some degree of short-term calibration drift while in operation. The degree of a particle counter’s short-term calibration drift is typically a result of engineering design philosophy; and the quality of the materials used in the particle counter.
When attempting to measure stability or short-term drift characteristics of a particle counter, variations can be a result of engineering design and material, but also include what the industry has termed “measurement uncertainty” which attempts to assign variability caused by systematic and random errors associated with the measurement.
Regarding measurement stability, if a particle counter is susceptible to short-term calibration drift, the calibration (and subsequently the measurements) of the particle counter may potentially fluctuate in-and-out of its acceptable calibration tolerances.
If this particle counter takes a series of measurements and the user is unable to identify those samples taken when the particle counter was intermittently out of calibration tolerance then, using a conservative approach, it must be presumed by default that the instrument cannot be trusted and all measurements are subsequently invalid.
Measurement Stability is of particular importance in regulated industries including the manufacture of active pharmaceutical ingredients (APIs) or parenteral and enteral drug products where both foreign particulate matter and microbiological contamination may result in the adverse health condition of one or more patients.
Climet surveyed pharmaceutical Quality Assurance Managers at a number of production sites in the US and Europe. The following question was asked: “Does it matter if a particle counter that is used during routine monitoring falls out of calibration tolerance as defined by the ISO 21501-4 standard, if even on a single or intermittent basis?”
The responses were unanimous; all agreed that it is absolutely unacceptable that a single sample measurement from a particle counter should fail any of the ISO 21501-4 test criteria.
When talking of repeatability or precision of an instrument’s measurements, this variability in results may frequently be caused by Instrument Drift from its calibrated state. Instrument Drift is defined as “A continuous or incremental change over time due to changes in metrological properties of a measuring instrument.”
Long-term Calibration Drift is defined as quasi-permanent changes in metrological properties (the calibration) of a measuring instrument. This might include a contaminated mirror or misaligned laser optics.

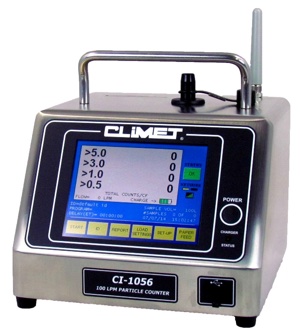
CI-x5x Series Wireless
These issues are typically identified and corrected by an interim calibration. In regulated industries, when an environmental monitoring instrument is found to be out of tolerance during its interval calibration, an expensive deviation report and investigation (typically costing £6,500–£9,800 for a simple investigation) are initiated to assess the risk of viable and/or non-viable contamination on past production.
The consequence of the investigation may result in a batch rejection and production shutdown. Conversely, Short-term Calibration Drift is defined as temporary changes in metrological properties of a measuring instrument. Short-term drift is caused by poor engineering design and poor quality materials.
The UK National Institute of Standards and Technology (NIST) confirms that short-term drift can be a problem for comparator measurements, such as particle counters, which cannot be measured by a gauge. Thus, during normal use, it is impossible to know if the instrument is maintaining its calibration over time, or instead floating in and out of calibration.
To determine the comparative scope and magnitude of measurement stability, a limited study was concluded in 2016. The methodology, assumptions, and test results are available for review at www.climet.com under Climet’s Technical Library. This information is made available for other companies to study and comment.
In tests against other major brands Climet uniquely met stability of measurement standards with 100% probability, and with substantial margin to spare. These other brands, statistically, were 3.5 times to 5 times more variable than Climet.
OptiCal Sciences is the exclusive representatives in UK and Ireland for CLiMET Instruments Inc
